A Cable for You, Sir!
Sending notifications from VMS to external systems has always been a wanted feature. Whether there is a night alarm or a camera gone offline, you cannot rely on the live operators alone. So how do you get those into your phone?
Emails and short messages are common methods for doing this; what about modern approaches? WhatsApp seems to be a trending messenger these days, but its API is closed and pricey. Luckily, there are other options. Let's take a look at Telegram: it has an open and powerful API, and it's also quite safe, so why not? Now, let's talk business.
Wait, What?
Telegram is a free personal and business messaging app with growing popularity. No surprise: it doesn't pass your messages to Facebook's featured ads and has a convenient choice of clients (Web, mobile, and desktop). Most users choose TG because of its safety but remember: it is as safe as its servers (which is always the case if you think about it). Also, the audience and the number of media content is growing so you can chat, read news, share files with others and across your own clients within the app, and even use the video chat.
If you don't have it yet, start with installing your preferred Telegram client. The simplest way is to use https://web.telegram.org/. For enhanced mobility, get the app for your Android or iOS. And, of course, don't forget there are dedicated desktop clients for your Windows, Mac, and Linux.
On your Evo server side, install the latest Evo version: HTTPS is supported starting from v.1.21, and Telegram does not accept plain HTTP (safe, remember?).
Now, we're ready to start, and the first step is to create a robot. (And it will be nothing like Optimus Prime!)
Create a Bot
How? Ask the botfather for a favor. Make sure to do it with respect.

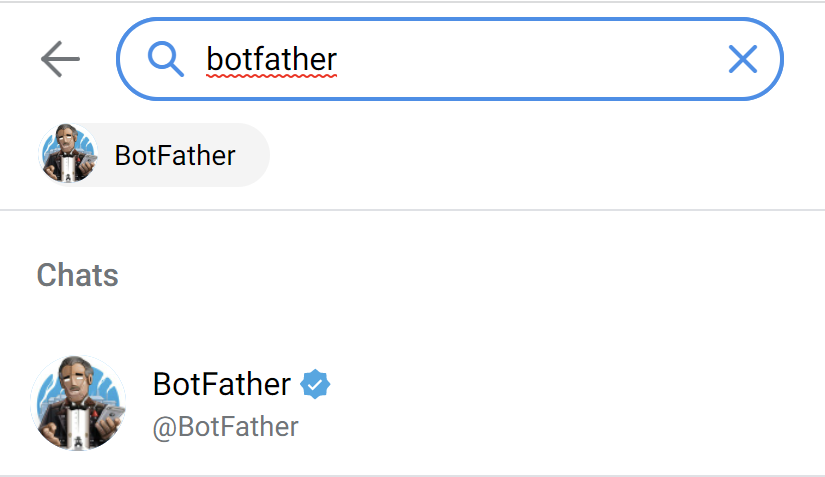
Open your Telegram app and search for @BotFather — then make him an offer he can't refuse! Just type /newbot and follow the guidelines.
In the same chat window, you can modify the bot settings, set a picture, and add commands; for now, its existence is enough. At this point, the most important thing you need is the API token from the botfather: you will need it to form requests.

BotFather is a bot, too
Security tip! Never let anyone know your bot token! It will give them complete control over your bot. If you think the token has been compromised, ask the botfather to revoke the current token. Users can be careless, but not IT administrators!
Now you can send yourself messages using the bot.
Behind Every Successful Frontend, There's Configuration
To build the message link, we need to understand how Telegram API works. Don't worry, there's just a small bit of it required here (but you can dive in if you want). All queries to the Telegram Bot API must be served over HTTPS and need to be presented in the following format:
https://api.telegram.org/bot/METHOD_NAME.
Like this example:
https://api.telegram.org/bot123456:ABC-DEF1234ghIkl-zyx57W2v1u123ew11/getUpdates
(don't worry, this API token is a dummy from Telegram's API description!)
There's a simple algorithm used to send direct messages to any user:
- Find out their ID (chat_id).
- Ask them to send a message to your bot first (for security reasons, obviously, bots cannot initiate chats)

So if the first recipient is you, find out your chat ID, and then send any message to your freshly created bot. To get your user ID: ask @userinfobot or other bots that give similar info (@RawDataBot, @getidsbot, a quick google shows quite a few).
Having done that, form an URL, which will send a message to your bot, using the following format:
https://api.telegram.org/bot123456:ABC-DEF1234ghIkl-zyx57W2v1u123ew11/sendMessage?chat_id=000000000&text=love%20you
- where bot123456:ABC-DEF1234ghIkl-zyx57W2v1u123ew11 is the bot token,
- sendMessage is the Telegram API method,
- chat_id is the chat identifier parameter of the target user or channel,
- and text is the message you wish to pass.
This should be enough for you to start enjoying the Evo-to-your-bot message flow. You can test the request simply by copying it into the browser address bar. If the message was sent successfully, the produced output in the browser window will start with OK:true, followed by result parameters. If you get a 404 or a similar error, carefully check the link and try again!

Bot conversation
Broadcast: a Channel or a Group
Apart from sending the messages privately to a single user, it is also possible to deliver them to multiple recipients at once. Telegram has groups and channels for this. Which one to choose?
- Channels allow you to broadcast passively to a list of users — theoretically, an unlimited audience — but, chances are, you will want a private channel for a CCTV alert broadcast.
- Groups allow all members to post messages, too — so this leaves room for a discussion — but it also means all users will be able to see each other.
You are free to create any number of either private or public channels (remember that anyone can join the public one). Why not create a separate private channel for the IT guys and another one for the company managers? For each channel, add your bot as an admin and allow it to post messages. For groups, just invite your bot to participate as a regular user — the rest is the same.
Any Arguments?
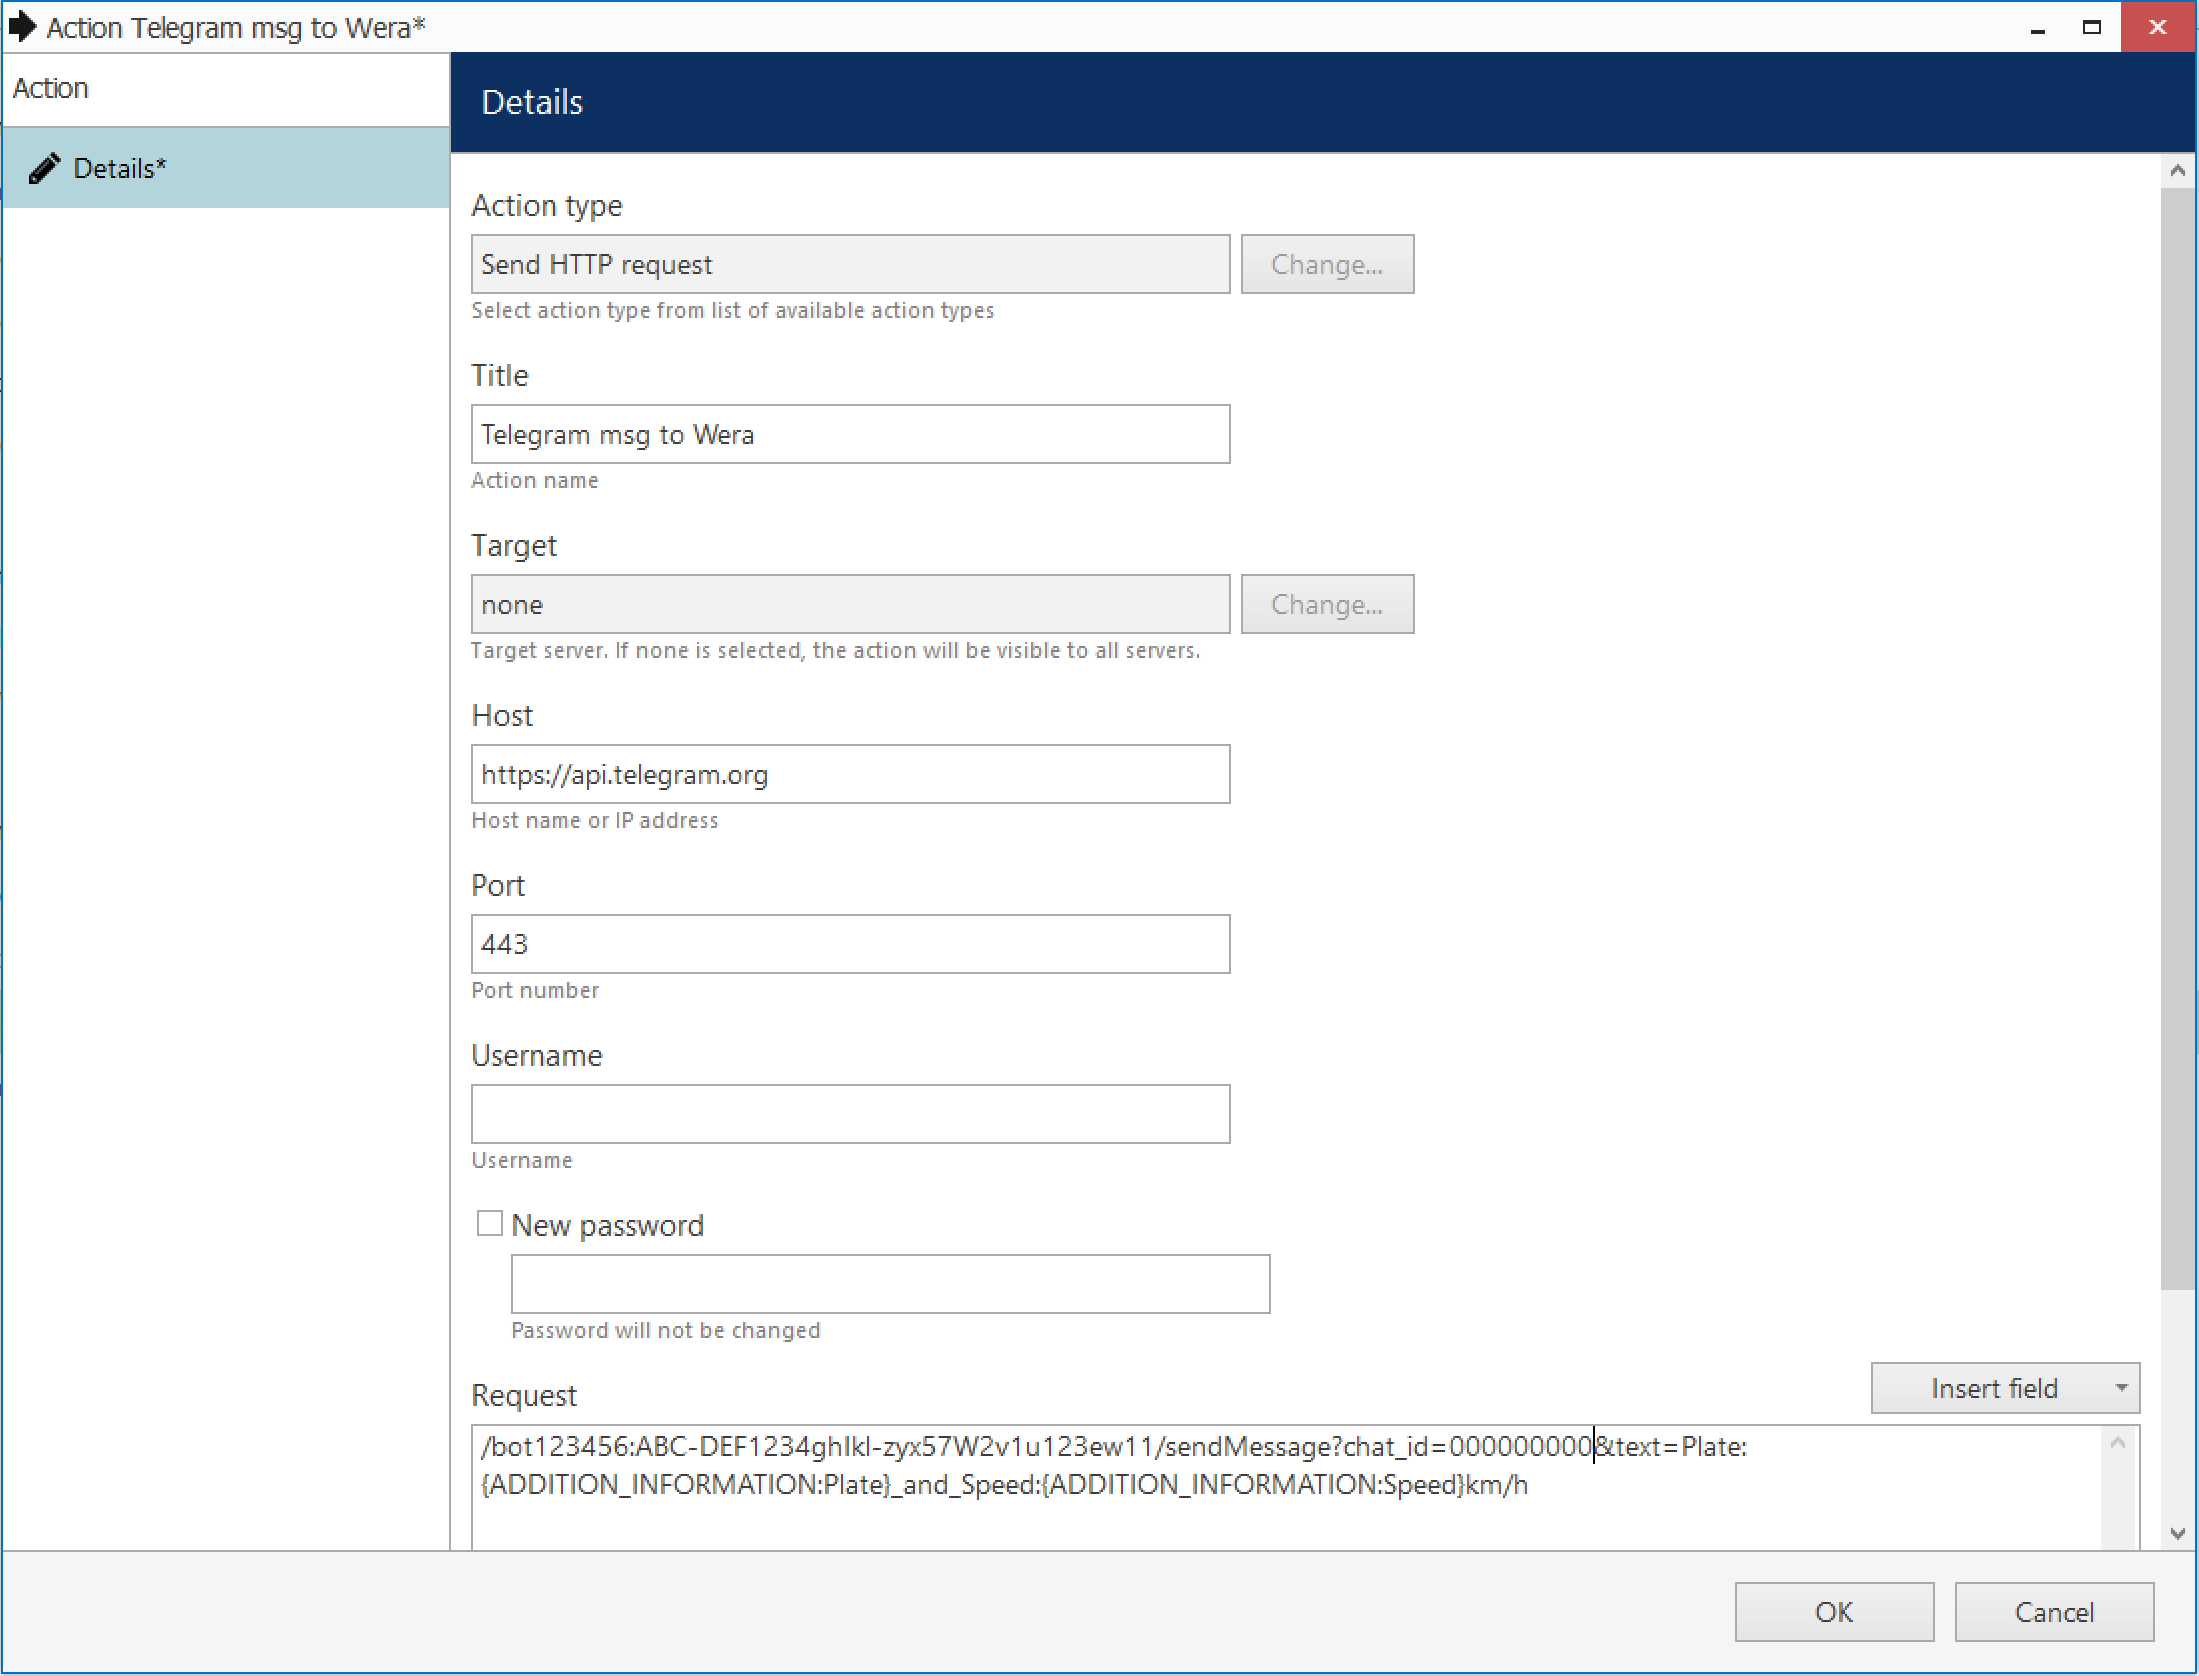
Now, let's see what happens on the Evo side. Traditionally, the Event & Action Configurator is responsible for automation, and this case is not an exception. Simply add a new action of the Send HTTP Request type and fill in the fields. As you saw above, all you need is a carefully built link containing the target and the message.
Depending on your use case and source event, you might want to add some event-related values to your message. For example, you can pass arguments from the event that triggered the message, such as {EVENT_SOURCE_TITLE} or {ADDITION_INFORMATION}.

Evo E&A action: Send HTTP request
Right-click the text box or click the Insert field button to see the list of available variables. Their availability depends on the originating event type. For example, the following macros are useful if the action is triggered by a recognition event:
{ADDITION_INFORMATION:Plate} — recognized license plate (for LPR) that is passed from the
{ADDITION_INFORMATION:Subject} — recognized subject name (for facial recognition)
{ADDITION_INFORMATION:Tag} — item tag, if available
Other fields refer to the event source, e.g., a channel:
{EVENT_SOURCE_ID} — internal identifier of the target channel (can be used for building Evo API links)
{EVENT_SOURCE_TITLE} — channel name
For other event sources (user buttons, doors, servers), their corresponding names will be reflected.
Now, use your action to build a rule, as usual.
Troubleshooting tip! After creating the action rule, verify if Evo can successfully execute it by clicking the Test button in the Rules tab. Check the Audit Log section > Servers to see the execution report. If you see that the HTTP response is not OK, use Wireshark to check the details.

Audit entry saying that the action rule execution has failed: double-click for more information
Can I Get Video, Too?
Of course! Check this one out: not just a message but a direct link to the live video stream!

Bot message with a live stream link from Evo
You will need to build an API link to the live video stream and then add it to the message. The link looks like this:
http://[Evo_server_IP]:[Evo_HTTP_port]/publicLive/[channel_ID]/mainStream, or, since we're all for security here,
https://[Evo_server_IP]:[Evo_HTTPS_port]/publicLive/[channel_ID]/mainStream (make sure you have HTTPS enabled and set up on the Evo side!)
Troubleshooting tip! Use plain HTTP at the configuration phase, as it will allow you to see the exact request and the Telegram response via Wireshark. Once your messages are coming through, switch to HTTPS before finalizing the setup.
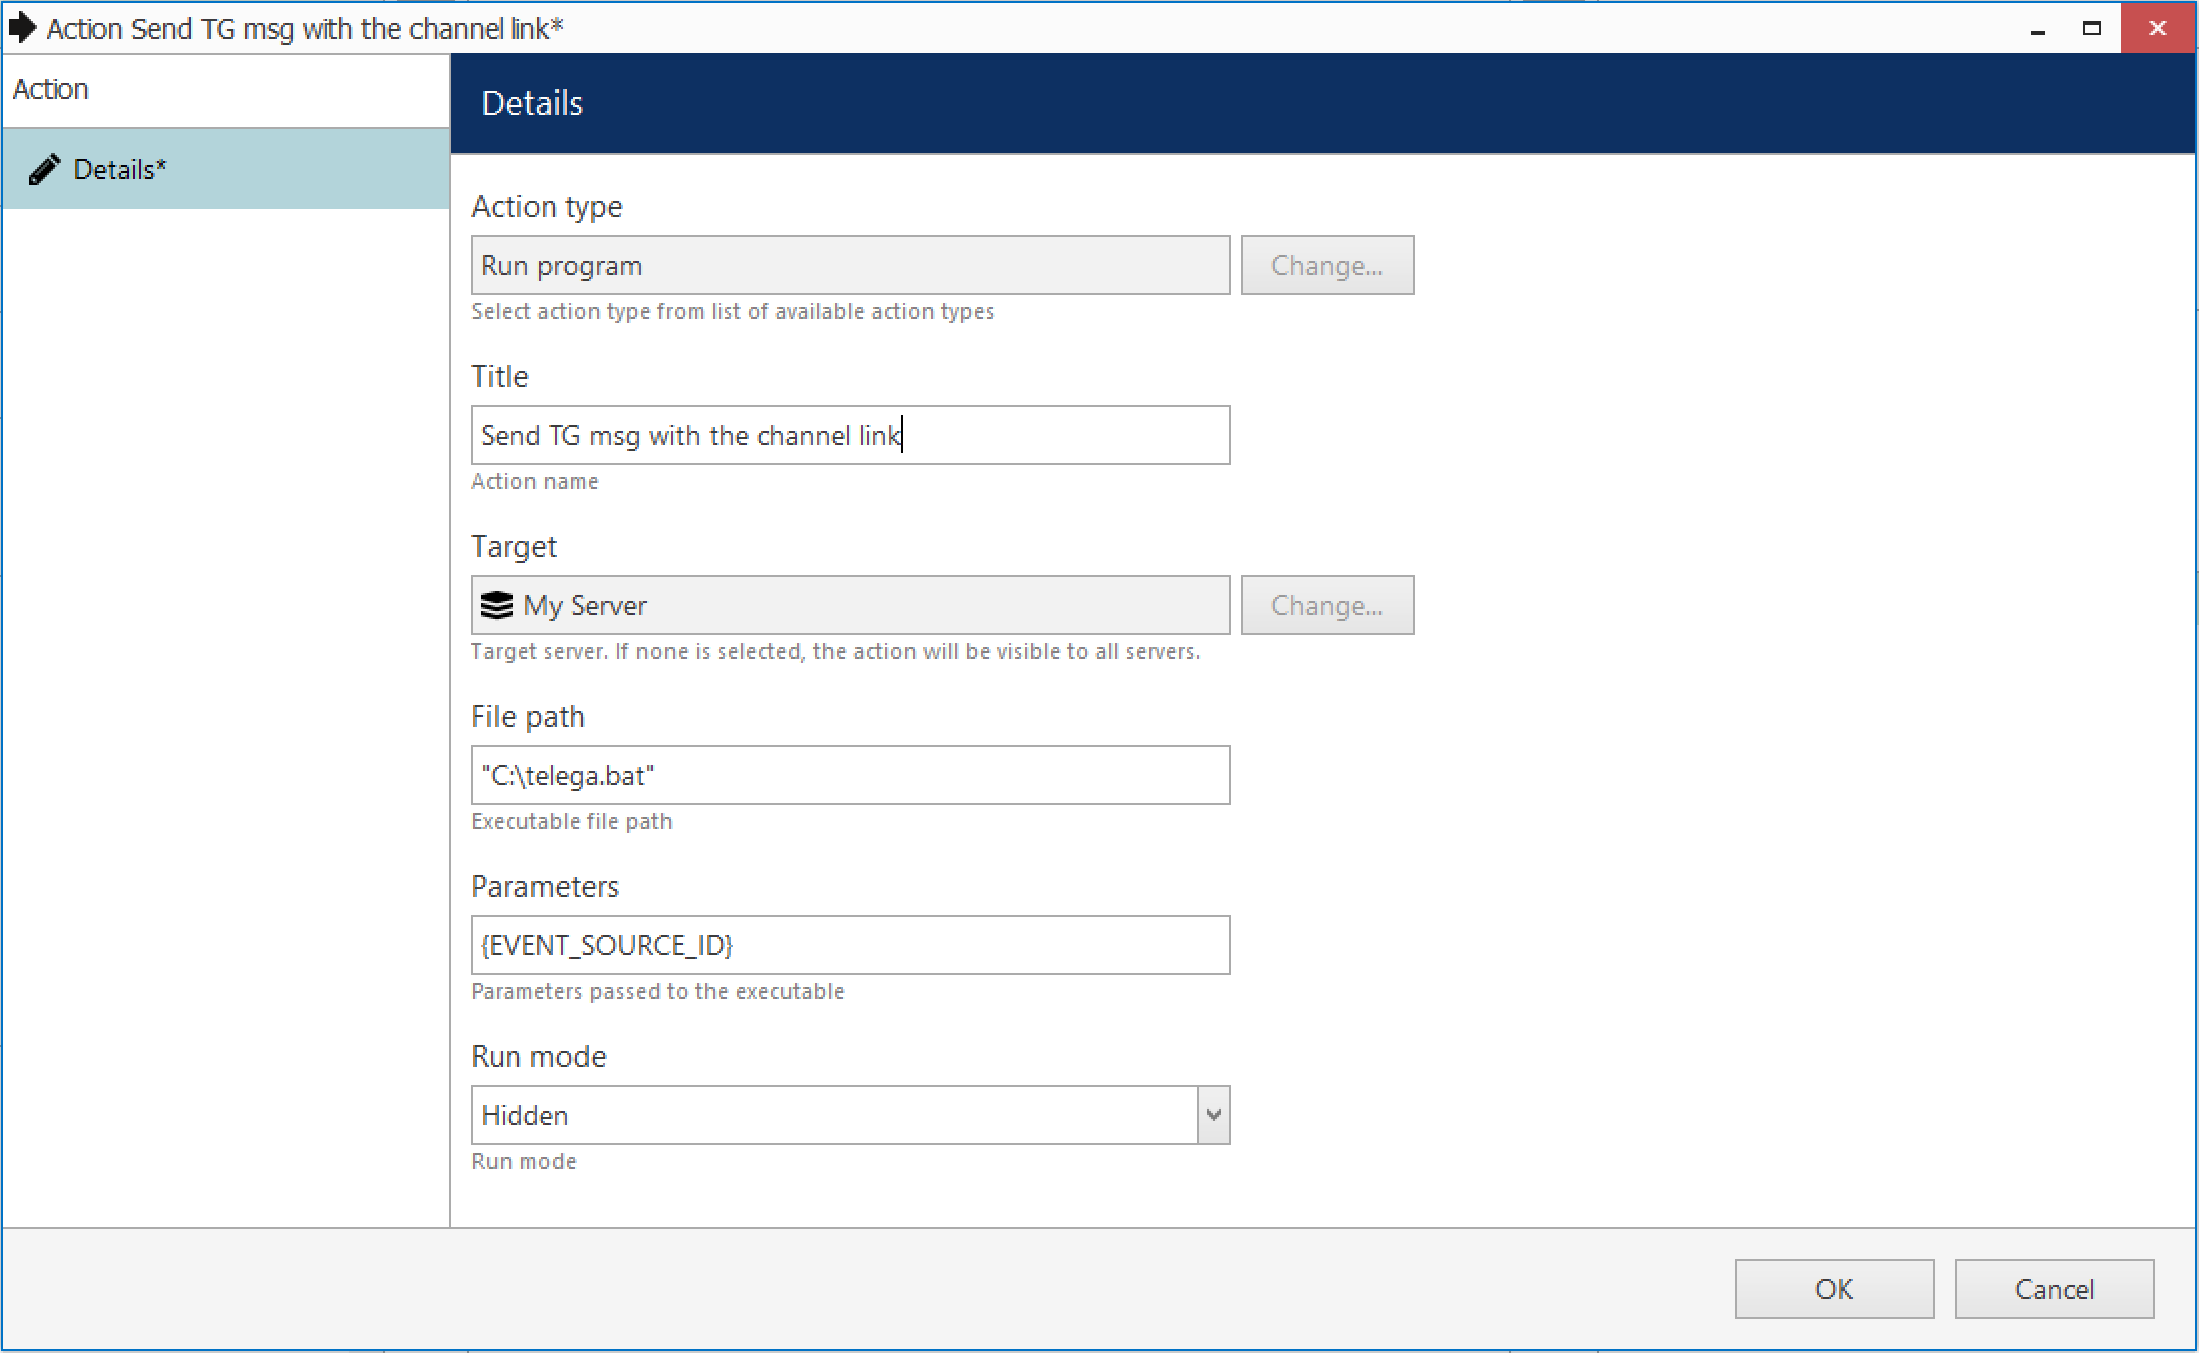
The message will contain another link in it in this case. Some characters and multi-line commands are not supported by the Send HTTP Request action, but that's not a problem: we shall use different action — Run Program. The action executes an external file with the specified parameters, so there is much more freedom.
The general plan is:
- Create a script
- Add a Run Program action
- Add permissions
Here is an example of a cURL command in the executable file. It includes both plain text and a channel URL, plus it uses a parameter (%1, which will be passed from the action):

You can combine multiple commands and execute more complicated scripts!
With cURL, you can put the whole request between quotation marks and freely use blank spaces and special characters inside.
Now, the action:

Evo E&A Action: Run an executable file
{EVENT_SOURCE_ID} will be used as an argument (%1 for the batch file in this example; if you're using a different scripting language, check its instructions on how to pass the params).
This takes care of sending the correct message to your Telegram client. Combine this action with events of your choice in your desired Evo server: these may be motion events, triggered analytics, opened doors, or customers buying certain items in the shops. Don't forget you can also dispatch multiple actions based on a single event.
For Justice, We Must Go to Permission Management
Finally, one last step: add permission so that you can actually open the link. For this, go to your target channel's Permissions > find Anonymous in the user list > give them the permission to View live video. This will allow you (and anyone you share the link with) to see the video.

Allow password-free access to the live stream
Congratulazioni! Now you know how to set up notifications for Telegram! Hopefully, you will go further and use those bots not just for CCTV, but also for other automated systems like smart homes or access control.
Have you set up Evo notifications for another messenger? Share your experience!
P.S. There's good news for those who prefer traditional methods: we are adding SMS sending in the next major release, Evo 1.22! Keep an eye on our news ;)


